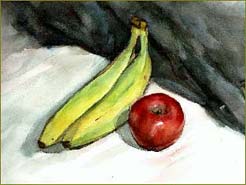
< How to Paint Two Bananas and a Red Apple Join
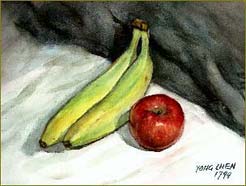
In this free watercolor painting lesson, you will learn how to paint fruit in watercolor.
Preparation
Materials used:
View info on brushes
9" x 12" cold-press watercolor block
#2B pencil
paints: Red, Yellow, Blue and Burnt Umber
1 apple and 2 bananas
In this free watercolor demonstration, I put two different objects together, which adds to the challenge and dimensionality of my painting. I first saw the setting as one subject and the balance between the items as another subject. Painting a still-life is a good way to practice the temperature of color and the value (darkness vs. lightness) throughout the painting.
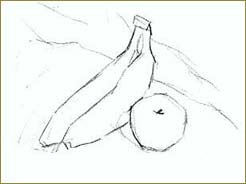
Placing Objects and Creating a Rough Sketch
I began by thinking where to place the main subjects, then worked out the visual relationships between the apple, the bananas, and the tablecloth in terms of size. How much of the watercolor painting will be taken up by the fruit? How much cloth? I am loose with my drawing until I feel that I have the relationships properly represented.
Rather than doing a pencil sketch on the watercolor paper, however, I either use a very light paint color to define the composition or do it in my mind.
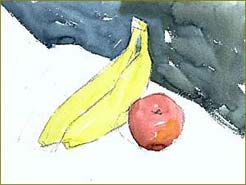
Establishing Color Relationships
When the sketch is complete, I add the first layer of color. For this exercise, I started with yellow, red, blue, and burnt umber and mixed them to make the other colors. Using the calligraphy brush described under materials, I applied the first layer of color to each object. When applying color, I begin with the lightest value and move to the darkest. The banana's first layer of color is the lightest yellow on the banana. Then, I mixed blue and yellow for the green tones in the banana and red and yellow for reddish-orange highlights on the apple. I added a little burnt umber to my yellow for the brown areas on the banana and I then used straight burnt umber for the stems.
I constantly compare the value between each of the objects. Do the colors of the different objects relate to one another the way I want them to?
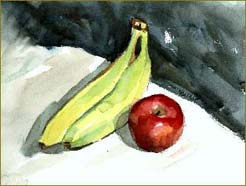
Tone and Detail
After the color relationships have been established, I add more detail to the apple, the banana, and the cloth. I am looking for the high and low value points. The highlights will remain more or less untouched, so I build to my darkest points by adding detail. Are the darkest and lightest points established? Is the overall color rich enough? I added layers of color to the darker areas until I was satisfied.
Correcting and Adding Details
I corrected areas where I overpainted using a technique known as "washing". To wash an area that appeared dark and “muddy”, I loaded a clean 1-inch flat brush with water and went over those sections with just the water, rinsing frequently, in order to lighten the color. It is important that at the beginning of the painting process you express yourself freely and only then correct your painting. I only keep the sections of the painting that I like, and add extra details as I see them. I constantly squinted so that I could compare the color and the value between the bananas, the apple, and the background.
Final Touches
A painting is finished when I am satisfied with it answering these questions. Does it express my impression of the subject? Does it capture a sense of the color and light that I see in front of me? Sometimes it is important to know when to stop painting. Sit back, look at the painting from a distance. Squint your eyes if you need to and then ask yourself: is there anything missing?